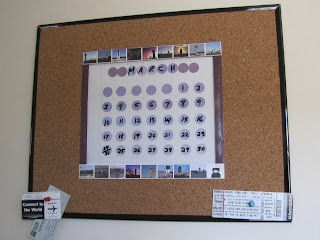
Dry Erase Calendar/Cork Board
DIY Dry Erase Calendar/Cork Board is a great project and is very useful. You will need a poster
board or picture frame. I chose a 20" x 16" poster board. You will need to take the poster board
apart or take the glass off the picture frame to place the colored circles for the calendar.
Place a white or different color paper first and then glue the circles on top. (Measure or visually
place the circles so that they look centered and lined up. Place the glass back on the poster or
picture frame.
You will then need to cut out the cork roll. I cut this one (outer section 19" x 15 3/8", inner
section 10" x 8 1/4" and the distance from outer to inner bottom 3 1/2", distance outer side to
inner side 5",but it all depends on how large you want the calendar area and the cork area to be.
Use a large amount of an all purpose glue on cork board, and glue onto frame. Place some
heavy books over cork board for a few hours or overnight.
Finally, you might want to frame the area around the calendar to hide any imperfections or just
to add color to the Dry Erase Calendar/Cork Board.
Materials Needed:
20 x 16 Poster Board or Picture Frame
Circular Punch
Color Paper or Paint Chips
All Purpose Glue
Cork Roll
Dry Erase Marker


Comments
Post a Comment